Case Study: MacBook Pro Model A3113 Liquid Damage Repair in Chelsea, London

Client Overview

A customer from Chelsea, London contacted Geeks Callout after accidentally spilling liquid onto their MacBook Pro Model A3113. Immediately after the incident, the laptop powered off unexpectedly and would no longer boot. The customer relied on the MacBook for professional work and was concerned about losing important documents, business files, and personal data.

The client required a fast, reliable, and cost-effective repair service that could diagnose the issue, recover the device, and restore it to full working condition without replacing the entire logic board if possible.

Initial Problem

After the liquid spill, the MacBook displayed several symptoms:

  • Device would not power on.
  • No charging indicator.
  • Keyboard became unresponsive.
  • Internal components showed signs of moisture.
  • Risk of motherboard corrosion.
  • Customer was concerned about data loss.

Liquid damage is one of the most serious issues affecting modern MacBooks. Even a small amount of liquid can create electrical shorts, corrode sensitive components, and permanently damage the logic board if not treated promptly

Step 1: Initial Inspection

The MacBook was carefully inspected upon arrival at the repair workshop.

The technicians first checked for:

  • External physical damage
  • Signs of liquid around the keyboard
  • USB-C charging response
  • Display condition
  • Internal moisture indicators

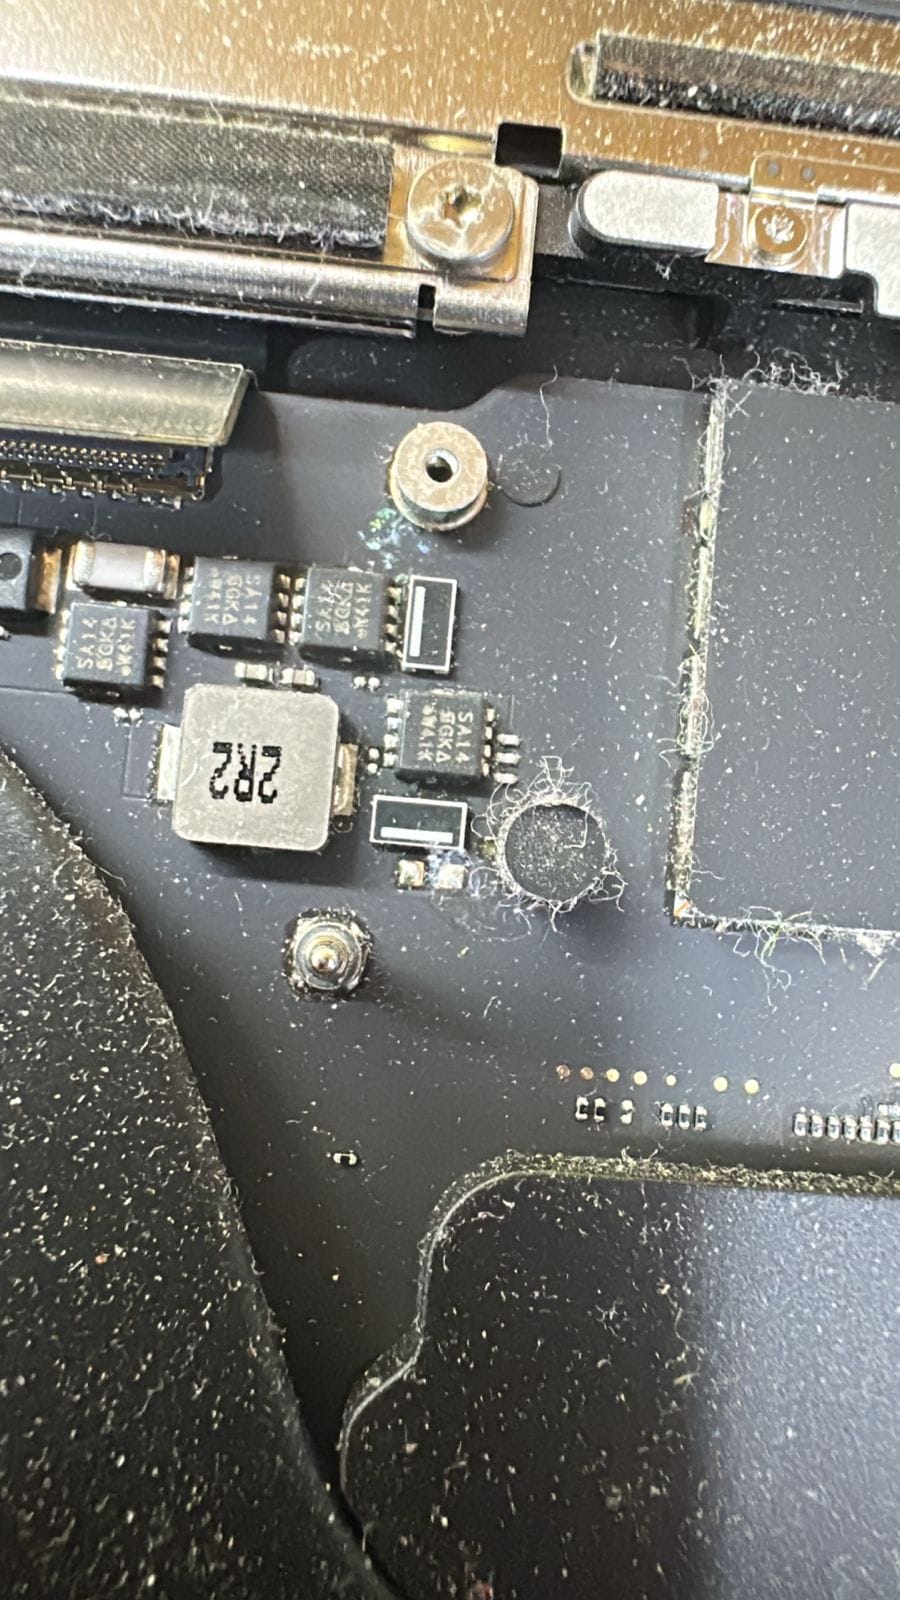
After opening the MacBook, visible liquid residue and corrosion were found around sections of the logic board.

Fortunately, the battery had not expanded, and there was no structural damage to the chassis.

Step 2: Safe Disassembly

The repair team completely disassembled the MacBook using professional Apple repair tools.

The following components were safely removed:

  • Bottom case
  • Battery connector
  • Cooling system
  • Logic board
  • SSD connections
  • Speakers
  • Keyboard connectors
  • Trackpad connectors

Disconnecting power immediately prevented further electrical damage during the repair process.

Step 3: Liquid Damage Assessment

Using magnification equipment, technicians inspected every section of the motherboard.

The inspection identified:

  • Corrosion near several integrated circuits
  • Oxidation around power management components
  • Residue on connector pins
  • Minor contamination near USB-C charging circuitry

Fortunately, no severe burns or broken PCB tracks were found, increasing the chances of a successful repair.

Step 4: Professional Cleaning

The affected components underwent a professional cleaning process.

This included:

  • Removal of corrosion
  • Cleaning with specialist electronic-grade solutions
  • Ultrasonic cleaning of the logic board
  • Drying using controlled equipment
  • Connector cleaning

This stage is essential because even microscopic corrosion can continue spreading long after the liquid has dried.

Step 5: Logic Board Diagnostics

Once cleaned, the logic board underwent detailed electrical testing.

Technicians checked:

  • Power rails
  • Short circuits
  • Voltage readings
  • Charging circuitry
  • Power management IC
  • USB-C communication
  • Battery charging system

One damaged power circuit component was identified as the primary cause preventing the MacBook from starting.

Step 6: Component-Level Repair

Instead of recommending an expensive motherboard replacement, Geeks Callout performed a component-level repair.

The damaged electronic component was carefully removed using professional microsoldering equipment.

A replacement component was installed, and all solder joints were inspected under magnification to ensure reliability.

This repair approach significantly reduced the overall repair cost compared to replacing the entire logic board.

Step 7: Reassembly

After completing the repair, every internal component was reinstalled.

The technicians reconnected:

  • Battery
  • Cooling fan
  • Speakers
  • Display cables
  • Trackpad
  • Keyboard
  • USB-C ports

Thermal paste was also inspected to ensure efficient heat transfer.

Step 8: Functional Testing

The MacBook was powered on successfully.

A complete series of diagnostic tests confirmed that the repair had been successful.

The following systems were tested:

  • Power-on sequence
  • Battery charging
  • Display
  • Keyboard
  • Trackpad
  • Wi-Fi
  • Bluetooth
  • USB-C ports
  • Camera
  • Speakers
  • Microphones
  • Touch ID
  • Sleep mode
  • Performance under load

The MacBook passed all functional tests without any further issues.

Step 9: Data Verification

One of the client’s biggest concerns was preserving important files.

After the repair:

  • User files were intact.
  • Documents opened successfully.
  • Applications launched normally.
  • No data recovery procedures were required.

This saved the customer significant time and avoided the expense of specialist data recovery services.

Results

Following the repair, the MacBook Pro Model A3113 was restored to full working condition.

Final Outcome

  • Successfully repaired liquid damage
  • Logic board restored
  • Device powered on normally
  • Charging system fully functional
  • Keyboard operational
  • Display working correctly
  • Data preserved
  • No motherboard replacement required
  • Customer resumed work with minimal downtime


Author 's Profile

Picture of Aamir.M

Aamir.M

Aamir Mehmood is a Senior IT Consultant & Technology Writer with over 15+ years of experience and one of the founders of Geeks Callout, an award-winning London-based IT support company specialising in PC, MacBook, and gaming repairs. He is recognised for delivering reliable, customer-focused IT solutions. Under his leadership, Geeks Callout has won multiple honours, including the 2023 Business Excellence Award and the 2025 SME UK Enterprise Award. Aamir also writes insightful articles to simplify complex technology, making him a trusted voice in London’s IT community.

Leave a Reply

Your email address will not be published. Required fields are marked *

Call Now Button