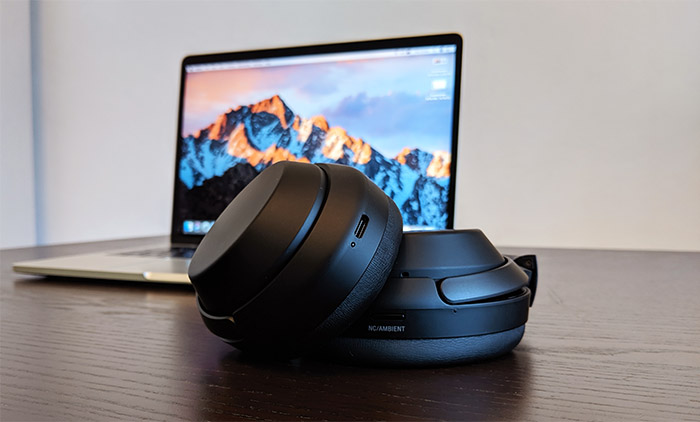
How to Connect Sony WH 1000XM3 to Laptop

30th Sep, 2022

Facebook
Twitter
LinkedIn
Email
Pinterest
WhatsApp
How to Connect Sony WH 1000XM3 to Laptop

When you can’t connect headphones with the Laptop, it comes off as a real struggle and hassle. Especially music enthusiasts or those working in the related field know the trouble well. So, whether you just bought a pair of Sony WH 1000XM3 headphones and want to learn how to connect them with your Windows 10 notebook, or you’re an existing user who is struggling with pairing errors and wants a quick solution to fix the issue, this article will resolve all your queries. Read on!

Guidelines you must follow before connecting both devices:

Firstly, there are a few guidelines you need to keep in check before connecting (pairing) the headset and the Laptop.

  1. Ensure that your Laptop supports the A2DP music playback connection format. You may get this info from your Laptop’s manufacturer’s website.
  2. Ensure your Laptop and the headphones are nearby or at least within the radar of 3 feet (1 meter).
  3. You’ve charged your Sony WH 1000 X3 adequately.
  4. Your laptop OS supports the headset.
  5. Check if your notebook comes with an in-built Bluetooth. And if it does, make sure it’s turned on. If you do not know how to turn the Bluetooth adapter on, enter your model number in Google and search for a guide that may help you. You could also study the manual that comes with the Laptop.

Pair the Sony headset and Laptop:

So, to pair the headset and the Laptop together, you’ll need to follow the steps below.

  1. Press the power button on the headset for two seconds to turn it on.
  2. Once you press the button, you’ll hear a voice command and two flashes of blue light indicating that the headset has entered the pairing mode.
  3. Open your notebook and go to the “Devices” by opening the settings.
  4. Click on the “Bluetooth” option and slide the toggle to “On” to activate it.
  5. Then, you may select WH 1000 XM3 to pair.
  6. If you’re asked for a password to pair, enter “0000” and proceed. Once paired, you’ll hear a voice command confirming the connection.

Important:

  • The headset can be paired with eight devices but will only play music from one device at a time.
  • Once the headset gets paired with your Laptop, it’ll connect automatically next time, so you won’t need to repeat the process.
  • If you don’t want it to connect automatically next time, you may want to turn off the headset or deactivate the Bluetooth on the Laptop.
  • If your devices do not pair together within five minutes, you’ll have to start the process from step one.
  • If you connect the headphones with a 9th device, the 1st device’s information will be overwritten. So, it won’t connect anymore, and you’ll need to pair it again.
  • If the pairing information gets deleted from the laptop’s or headset Bluetooth, you may encounter errors in connecting the devices. In this case, start the pairing process from step 1.
  •  

How to connect the headset when it’s already paired?

In this scenario, you may have three options if your device is already paired but doesn’t connect. Let’s see what you can do.

Method#1:

  1. Right-click on the volume icon and select “Playback Devices.”
  2. Right-click on the headset name (WH 1000 XM3) and choose “Connect.” This will establish the connection back.
  3. In case you can’t see the headset’s name, click on the “Sounds” tab and choose “Show Disconnected Devices.” From there, follow the second step.

Method#2:

  1. Go to Settings > Devices > Bluetooth.
  2. Right-click on the headset’s name (WH 1000XM3). Note that whatever derivation of the code shows, it’ll contain 1000XM3.
  3. Select “Properties.” A window will pop up; choose the “Services” tab and tick mark all services.
  4. After that, Audio Service with the headset’s name will appear.
  5. Once your headset pairs with the Laptop and shows confirmation, you’ll have to change settings from audio Playback to Headset.

Method#3:

  1. You may have to factory reset the headset if nothing else works. So, please turn off the headset and ensure it isn’t plugged in for charging. You may disconnect the charging cable as well.
  2. Press the power button with the NC/Ambient button together for 10 seconds.
  3. The blue light will flash 4 times to indicate the reset’s success. This step will delete all pairing information and initialize the headset to default settings.
  4. You may then proceed to pair the devices using the abovementioned steps.

Final thoughts:

Errors may occur while you try to connect/pair your Sony headphones with the PC/Laptop via Bluetooth. However, the workaround should help you fix the problem. If none of the above instructions prove fruitful, you may reinstall your Bluetooth driver on the Laptop and try again. Otherwise, you may contact a professional for help. 

Call Now Button